-
Prepare Your CSV File: Make sure you have your invoice items data in a CSV file. The first line of the file should contain the column headers, which match the format provided in the instructions. The file should also be saved in UTF-8 encoding.
-
Format Your Data: Ensure that the date column is formatted in the Y-m-d format (e.g., 2023-08-24). The "Group," "Tax," and "Tax2" columns should contain either the corresponding names or IDs, as mentioned in the instructions.
-
Access the Import Invoice Items Feature: Log in to your sales application and navigate to the "Sales" module. Within the sales module, look for the "Import Invoice Items" feature.
-
Upload CSV File: Click on the "Choose CSV File" button to upload your prepared CSV file containing the invoice items data.
-
Mapping and Validation: The system will likely take you through a mapping process where you match the columns in your CSV file to the corresponding fields in the application. This step ensures that the data is imported accurately. During this process, you might also encounter validation checks to ensure data consistency and accuracy.
-
Field Mapping: For each column in your CSV file, map it to the appropriate field in the application. For example, map the "Description" column to the "Description" field, the "Rate - CHF" column to the "Rate" field, the "Tax" column to the "Tax" field, and so on. This step might involve selecting from dropdowns or entering data.
-
Tax and Group Information: In the "Group," "Tax," and "Tax2" columns, make sure you provide either the name or ID of the corresponding group and tax. You can obtain this information as mentioned in the instructions.
-
Tenant ID: If applicable, provide the tenant ID in the "Perfex saas tenant id" column.
-
Review and Confirm: After mapping all the necessary fields and ensuring the correctness of the data, review the information one more time.
-
Initiate Import: Once you are satisfied with the data mapping and review, initiate the import process. The application will start processing your CSV file and importing the invoice items.
-
Confirmation and Feedback: After the import is complete, the system will likely provide a confirmation message, indicating the number of items imported and any potential errors or warnings encountered during the process.
-
Verify Imported Data: After the import, navigate to your invoice items section within the application and verify that the imported items are correctly listed with their descriptions, rates, taxes, groups, etc.
-
Download Sample: Sample download to view requirements.
-
Import: Button to import data
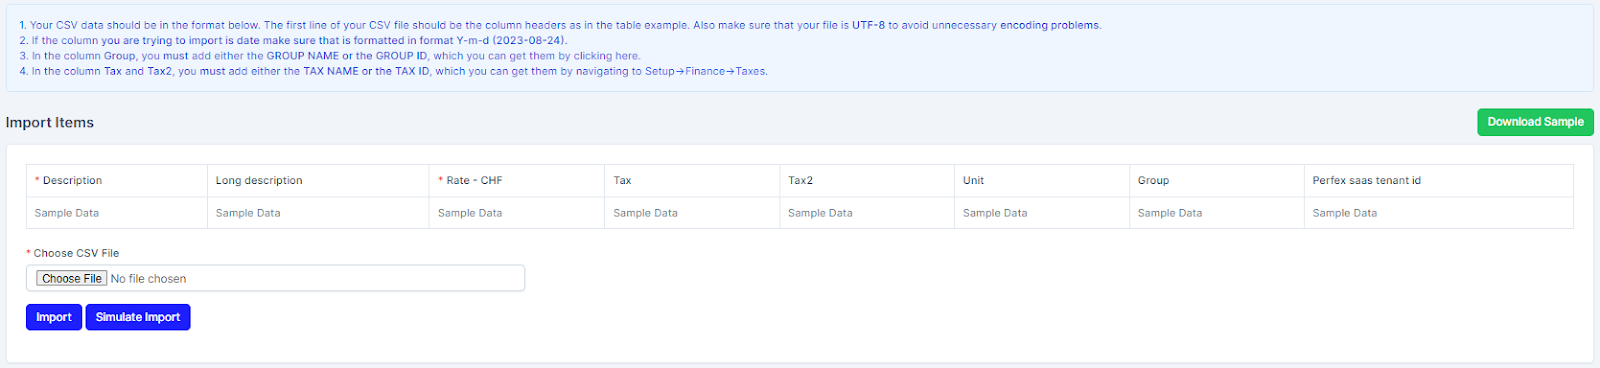
Figure 1 Import Invoice Items