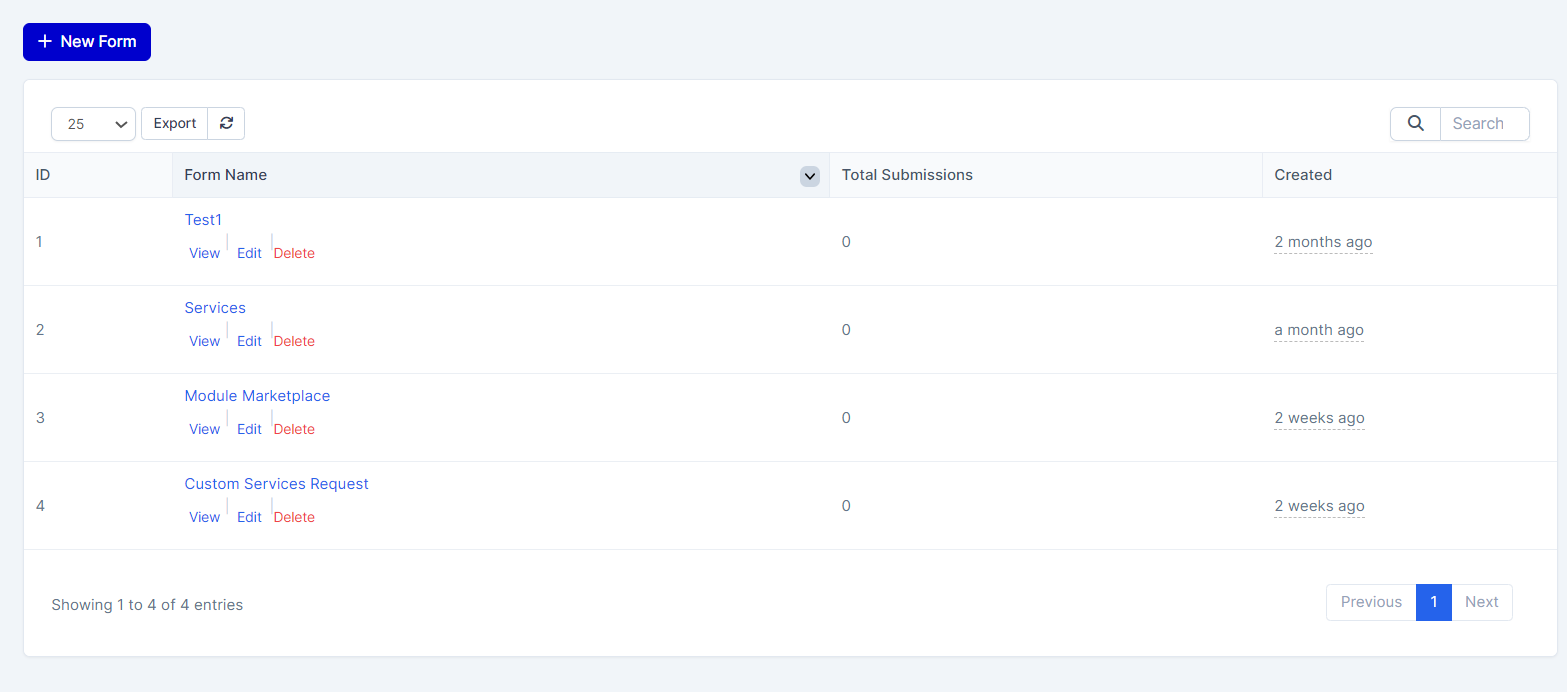
The Lead List displays essential information for managing lead submissions, including the following columns:
-
ID: Provides a unique identifier for each lead entry, aiding in individual lead tracking and reference.
-
Form Name: Indicates the name or title of the form from which the lead was submitted, aiding in categorization and organisation.
-
Total Submissions: Displays the total number of submissions received for each lead form, offering insight into the form's performance and popularity.
-
Created: Shows the date and time when the lead entry was created or submitted, assisting in chronological sorting and analysis of lead data.
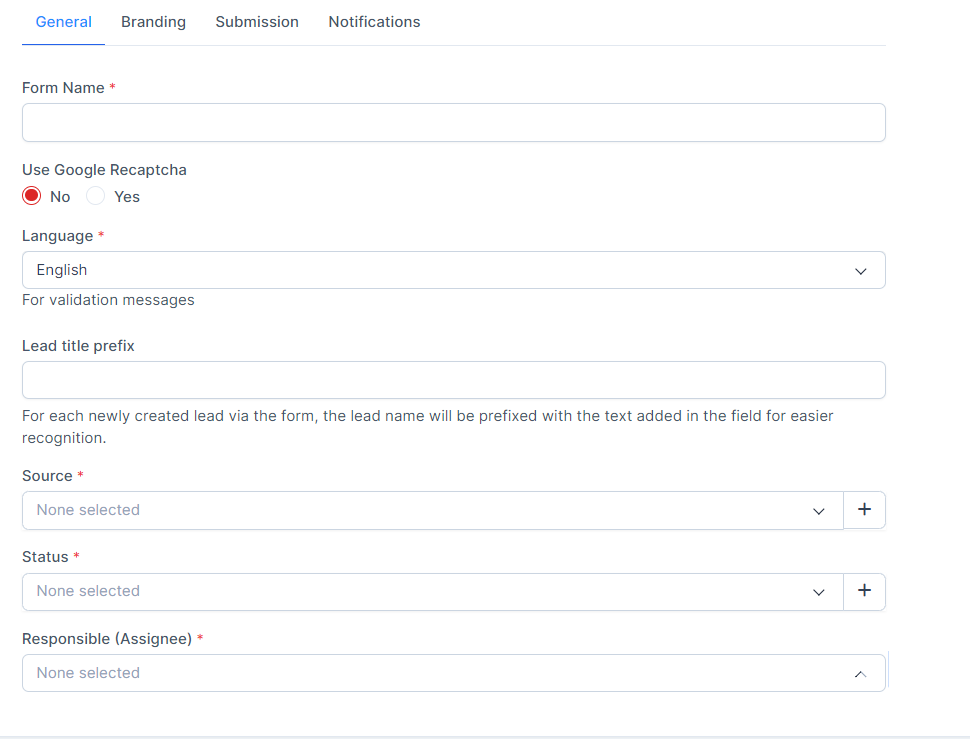
When defining a new lead form, users can customise various aspects across four tabs: General, Branding, Submission, and Notification.
General
-
Form Name: Specify the title or name for the lead form, providing a clear identifier for internal reference and user interaction.
-
Use Google reCAPTCHA (Yes or No): Choose whether to enable Google reCAPTCHA for enhanced form security, helping to prevent spam submissions.
-
Language: Select the preferred language for the lead form, ensuring compatibility and accessibility for users across different linguistic backgrounds.
-
Lead Title Prefix: Set a prefix to be added to the title of each lead entry, facilitating consistent naming conventions and organisation.
-
Source: Define the source from which leads are generated, assisting in tracking and analysing the effectiveness of various lead generation channels.
-
Status: Determine the initial status assigned to new leads captured through the form, streamlining workflow management and prioritisation.
-
Responsible Assignee: Designate the team member responsible for handling leads generated through this form, ensuring efficient allocation and follow-up.
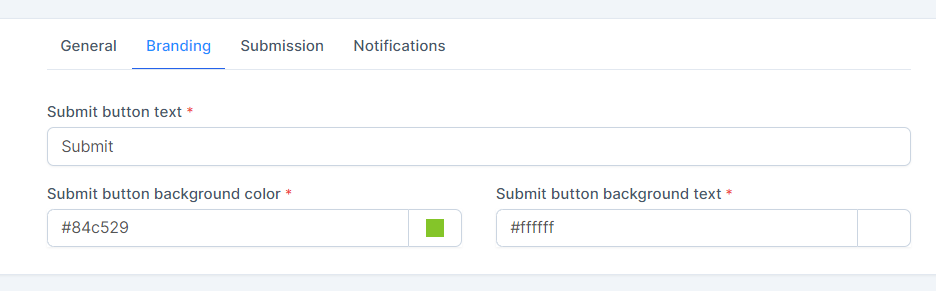
Branding
-
Submit Button Text: Customise the text displayed on the submit button of the lead form, aligning it with brand messaging or call-to-action.
-
Submit Button Background Colour: Define the background colour of the submit button to match the brand's visual identity or design scheme.
-
Submit Button Text Colour: Specify the colour of the text displayed on the submit button for optimal contrast and visibility, ensuring readability and usability.
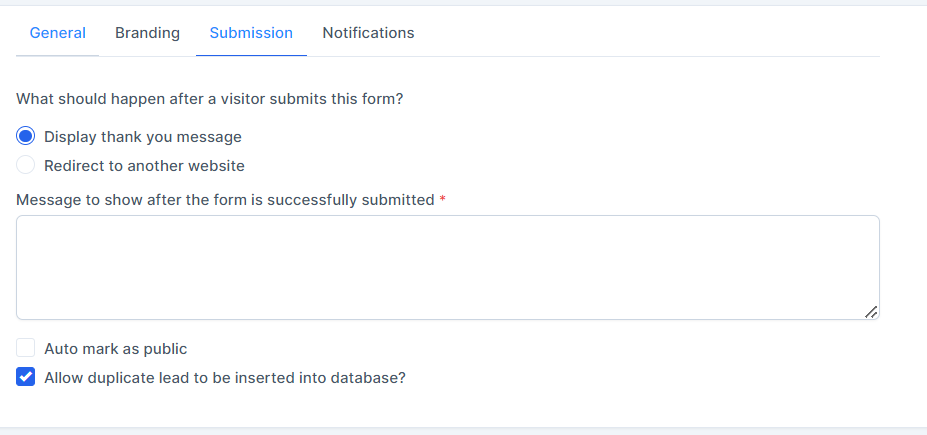
Submission
-
What should happen after a visitor submits this form?
-
Display thank you message (radio button): Show a thank you message to visitors upon form submission if selected; provide option to customise message.
-
Redirect to another website (radio button): Redirect visitors to another website after form submission if selected; provide option to input redirect URL.
-
-
Message to show after the form is successfully submitted: Customise message displayed after successful form submission
-
Auto mark as public (checkbox): Automatically designate submitted leads as public upon form submission, streamlining visibility without manual intervention.
-
Allow duplicate leads to be inserted into the database? (checkbox): Grant permission for duplicate lead entries to be stored in the database, providing flexibility in data management based on specific needs or preferences.
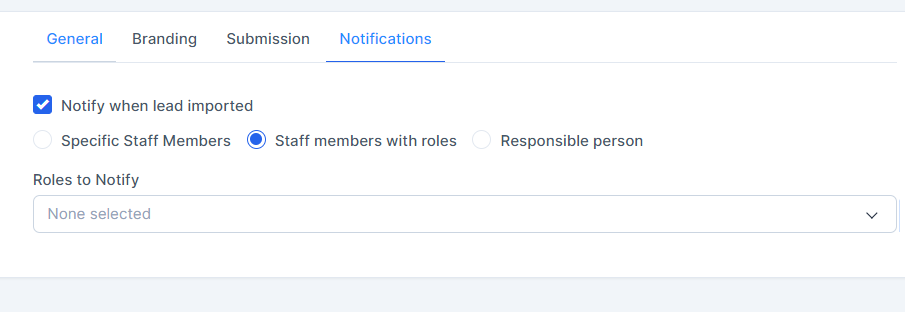
Notifications
-
Notify When Lead Imported (Checkbox):
-
Enable notifications to be sent when a lead is imported, facilitating timely awareness of new lead data additions.
-
-
Specific Staff Members or Staff Members with Roles or Responsible Person (Radio Buttons):
-
Select the method of notification recipient designation:
-
Choose either specific staff members, staff members with designated roles, or the responsible person assigned to the lead.
-
Depending on the selection, a corresponding dropdown will appear to select the appropriate staff member, role, or responsible person.
-
-